13 Effective Ways to Treat Keloid Scars

image

13 Effective Ways to Treat Keloid Scars

Introduction to Keloid Scars

Keloid scars can be a nuisance for many people, especially if they develop after a tattoo, body piercing, or even a small injury. Although these scars are typically harmless, they may cause discomfort and affect your self-esteem. If you find yourself searching for effective ways to treat keloid scars, you’re not alone! In this blog, we will delve into the nature of keloids, why they occur, and the various treatment options available, especially tailored for Indian skin through our firm, The Skin Artistry. Let’s explore how you can tackle keloid scars in a way that’s effective and safe.

Understanding Keloids

A keloid is created when the body produces excess collagen during the healing process, forming a raised tissue over the affected area. This type of scar can be larger than the original wound and may appear reddish or darker than your natural skin tone. While most keloids are benign, they can result in pain or itching, especially if they grow on joints where movement is affected. Consulting with a dermatologist can help ensure accurate diagnosis and treatment options specific to your needs.

1. Pressure Therapy

One effective method for treating keloid scars is through pressure therapy. This involves using compression dressings or pressure earrings to apply consistent pressure on the keloid, which may help in flattening it over time. Sustaining this treatment for several months can significantly improve the appearance of keloids.

2. Silicone Sheets or Gels

Silicone sheets or gels can also be beneficial in flattening keloids. When applied directly to the scar, they create a protective barrier while helping to hydrate and manage scar tissue. To see the best results, wear silicone dressings for several hours each day over an extended period.

3. Corticosteroid Injections

Corticosteroid injections can help reduce the size of keloids by diminishing inflammation. Typically administered by a dermatologist at regular intervals, these injections may be mildly painful, but they can yield promising results in reducing the dimensions of keloids.

4. Cryotherapy

Cryotherapy involves the application of liquid nitrogen to freeze the keloid, which can aid in its reduction. This method is especially effective for smaller keloids and should be performed in a clinical setting for safety and effectiveness.

5. Pulsed Dye Laser Therapy

Laser treatment, particularly pulsed dye lasers, can help flatten keloids safely and effectively. This method also minimizes potential damage to the surrounding skin, making it an appealing option for many individuals.

6. Surgical Removal

Surgical procedures may be utilized to excise keloids. However, its essential to keep in mind that the keloid may reappear post-surgery if further preventive measures are not taken, such as steroid injections.

7. Ointments and Creams

There are several topical ointments available that may help in managing keloids. Creams containing retinoids or imiquimod can provide therapeutic benefits and assist in preventing keloids from returning, especially after surgical procedures.
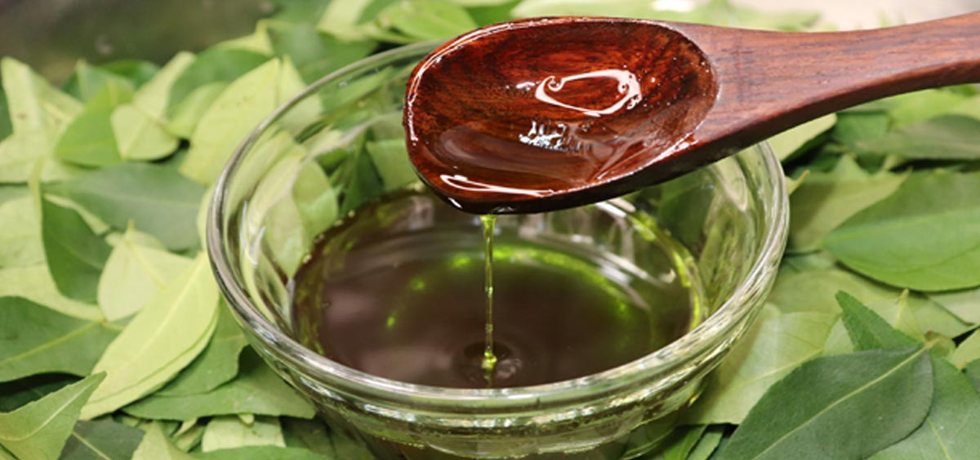
8. Home Remedies

For those who prefer natural methods, several home remedies may help in alleviating the symptoms of keloids. Apple cider vinegar, garlic oil, and honey are some popular options that can promote healing and manage discomfort when applied regularly.

9. Avoiding Unnecessary Skin Trauma

If you’re at risk for keloid formation, it’s advisable to avoid unnecessary skin trauma, including cosmetic surgeries, body piercings, or tattoos. Taking precautions in wound care can also minimize the chances of keloid development.

10. Staying Hydrated and Maintaining Skin Care**

Keeping the skin well-hydrated is crucial for overall skin health. Regular application of moisturizers can help maintain skin elasticity and may even minimize the appearance of existing scars.

11. Vitamin E Treatments**

While some people swear by vitamin E applications for scar treatment, it’s essential to note that the effectiveness varies from person to person. However, it’s generally safe to apply vitamin E oil on keloids to maintain skin hydration.

12. Emotional and Psychological Support**

Living with keloid scars can sometimes affect self-esteem and emotional well-being. Engaging in support groups or counseling can be beneficial for coping and connecting with others who understand your experience.

Conclusion: Seek Professional Guidance

Keloid scars can be complex to treat, and it’s essential to find a method that works best for your skin type and individual circumstances. Consulting with a professional dermatologist can help tailor the best treatment plan for your needs. At The Skin Artistry, our specialists understand the unique skin challenges faced by individuals, especially in India, and are ready to offer customized advice and treatments.

FAQ

What happens if I attempt to pop a keloid?
Popping a keloid is not advisable as it can lead to infections and worsen the situation rather than improve it.

How long will it take for keloids to fade?
The time for k

Unmasking Hyaluronic Acid Myths

image

Unmasking Hyaluronic Acid Myths

Understanding the Truth About Hyaluronic Acid

Hyaluronic Acid has received a lot of attention in the skincare world, often touted as a miracle ingredient. Yet, alongside its rise in popularity, numerous myths have taken root, leaving many confused about its actual benefits. In this blog, we will unmask six pervasive myths about Hyaluronic Acid, providing clarity so you can confidently incorporate it into your skincare routine.

What Is Hyaluronic Acid?

Hyaluronic Acid is a naturally occurring substance in our bodies, primarily found in the skin, joints, and connective tissues. This gel-like substance excels at retaining moisture, holding up to a staggering 1,000 times its weight in water. With its remarkable properties, it significantly aids in maintaining skin firmness and elasticity. Commonly featured in serums, moisturizers, and other skincare products, Hyaluronic Acid hydrates the skin, plumping it while also mitigating fine lines and wrinkles.

Myth #1: Hyaluronic Acid is Only for Dry Skin

A prevalent misunderstanding is that Hyaluronic Acid is exclusively beneficial for dry skin types. Many believe it won’t offer any advantages if they have oily skin.
In reality, this ingredient is suitable for all skin types. It works effectively to balance moisture levels, making it equally advantageous for those with oily skin by keeping it hydrated without adding greasiness.

Myth #2: Hyaluronic Acid Can Replace Your Moisturizer

Another assumption is that Hyaluronic Acid can serve as a complete replacement for moisturizers. While it’s a potent humectant that draws moisture into the skin, it is most effective when paired with a good moisturizer. Using a moisturizer alongside Hyaluronic Acid can enhance your skins hydration, making your skincare routine even more effective.

Myth #3: Hyaluronic Acid Feels Heavy and Greasy

Some people may shy away from using Hyaluronic Acid, believing it has a heavy or greasy texture. However, this could not be further from the truth. Hyaluronic Acid is lightweight and easily absorbed, providing hydration without leaving any oily residue. Its non-greasy formula makes it a favorite for anyone looking to keep their skin fresh and hydrated.

Myth #4: Hyaluronic Acid is a Harsh Chemical

The notion that Hyaluronic Acid is a harsh chemical that might irritate the skin is another common myth. In truth, it is a natural substance found in the body and is typically derived from plant sources. It is gentle on the skin and suitable for all, even those with sensitive skin.

Myth #5: Hyaluronic Acid Causes Acne

Many individuals with acne-prone skin might worry that using products containing Hyaluronic Acid could exacerbate their condition. However, this ingredient is actually beneficial for such skin types, as it hydrates without clogging pores and can even help reduce the appearance of acne scars.

Myth #6: Hyaluronic Acid is an Exfoliator

Some people mistakenly believe that Hyaluronic Acid functions as an exfoliator. While it does assist in removing dead skin cells to some extent, its primary role is hydration. Thus, it should be used in conjunction with a proper exfoliation regimen tailored to your skin’s needs.

Conclusion

Armed with the facts about Hyaluronic Acid, you can better appreciate its role in your skincare routine. This remarkable ingredient helps keep the skin hydrated and plumped, making it suitable for everyone. If you’re looking to enhance your skincare mosaic, consider incorporating Hyaluronic Acid into it for fantastic hydration benefits.

For professional assistance and expert advice from leading dermatologists like Dr. Hital Patel, experience the benefits of Unmasking Hyaluronic Acid Myths with Hair & Skin Specialist Dr. Hital Patel at The Skin Artistry. Our clinics in PDPU Gandhinagar, Vastrapur Ahmedabad, and Hyderabad (Visiting Consultant) offer top-quality care and personalized treatments. Visit us today to learn more about our services and take advantage of our special offers! For more insights, updates, or to collaborate, stay connected with The Skin Artistry.

Ultimate Guide to Mommy Makeover: Procedures, Costs, and Recovery

image

Ultimate Guide to Mommy Makeover: Procedures, Costs, and Recovery

Introduction to Mommy Makeovers

The journey of motherhood is beautiful, but it often brings changes to a woman’s body that can impact her self-esteem. The Mommy Makeover is a comprehensive approach designed to help mothers reclaim their bodies after childbirth. This blog will explore the various procedures involved, provide insight into the costs involved, and guide you through the recovery process. At The Skin Artistry, we understand the importance of feeling your best, and we’re here to assist you every step of the way.

Mommy Makeover Procedures

The Mommy Makeover typically includes several aesthetic procedures tailored to your individual needs, addressing common concerns that arise post-pregnancy.

Tummy Tuck (Abdominoplasty): This surgical procedure tightens abdominal muscles and removes excess skin. It effectively addresses changes in the abdominal area, helping restore a flatter and firmer appearance.

Breast Augmentation or Lift: Many women experience sagging or loss of volume in their breasts after pregnancy. Breast augmentation involves the use of implants to enhance volume, while a breast lift reshapes and elevates the breasts to counteract these common effects.

Liposuction: This procedure targets stubborn fat deposits that remain even after diet and exercise. Liposuction helps contour various areas of the body, leading to a more sculpted and streamlined appearance.

Body Contouring: Alongside liposuction, body contouring includes other techniques designed to remove excess fat and tighten skin, achieving a more toned and aesthetically pleasing body shape.

Facial Rejuvenation: To complement body aesthetics, many women opt for facial treatments such as Botox or dermal fillers, which help restore a youthful appearance by addressing fine lines and volume loss.

Understanding Mommy Makeover Costs

Costs for Mommy Makeover procedures can vary greatly depending on several factors. The specific combination of surgical and non-surgical treatments selected will significantly influence total expenses.

Surgeons Expertise: A highly skilled and experienced surgeon may command higher fees, reflecting their reputation and track record of successful outcomes.

Facility Charges: The choice of surgical facility, including operating room fees and recovery area accommodations, contributes to overall costs, making it essential to choose a facility with excellent standards of care.

Anesthesia and Medical Fees: The utilization of anesthesia during surgery incurs additional charges. Consideration of medical assessment fees, preoperative consultations, and postoperative follow-ups also plays a key role in understanding the total financial commitment.

Postoperative Care: Beyond surgery, patients should budget for necessary medications, compression garments, and any follow-up treatments to ensure a smooth recovery.

Successful Recovery from Mommy Makeover Procedures

Recovery after a Mommy Makeover is a crucial part of the journey where the body heals and adjusts to the changes made.

Initial Rest Period: Rest is paramount following surgery. Typically, this involves several days with limited physical activity, allowing the body to initiate the healing process.

Postoperative Monitoring: Close monitoring by medical professionals is vital during the initial days to identify any potential complications early.

Pain Management and Support: Managing discomfort is an integral part of recovery. A doctor may prescribe medications to ease pain, along with guidance on wearing compression garments to support healing and reduce swelling.

Follow-Up Appointments: Regular visits to your surgeon are necessary to monitor healing progress, address concerns, and adjust the recovery plan as needed.

Gradual Resumption of Activities: Patients should be informed to gradually return to normal routinesboth in terms of work and exercisebased on their individual healing progress.

When to Consult a Doctor?

If youre considering a Mommy Makeover, the best first step is to consult with a qualified professional. The Skin Artistry offers personalized Mommy Makeover solutions tailored to your unique needs. Our expert team will guide you throughout the process, from understanding the procedures and costs to ensuring an optimal recovery.

Your confidence and comfort in your body are paramount, and were here to help you achieve that. Schedule a consultation today to explore your options and start your journey toward feeling your best.

Conclusion

A Mommy Makeover can be a transformative experience that helps you reclaim your body and confidence after pregnancy. Understanding the procedures, associated costs, and recovery is vital for making an informed decision. At The Skin Artistry, we’re dedicated to ensuring your journey is as smooth and rewarding as possible.

For professional assistance and expert advice from leading dermatologists like Dr. Hital Patel, experience the benefits of the Ultimate Guide to Mommy Makeover: Procedures, Costs, and Recovery with Hair & Skin Specialist Dr. Hital Patel at The Skin Artistry. Our clinics in PDPU Gandhinagar, Vastrapur Ahmedabad and Hyderabad (Visiting Consultant) offer top-quality care and personalized treatments. Visit us today to learn more about our services and take advantage of our special offers! For more insights, updates, or to collaborate, stay connected with The Skin Artistry.

Unveiling the Sun Rash Mystery: A Guide to Understanding Your Skin&#8217 s Red Flag

image

Unveiling the Sun Rash Mystery: A Guide to Understanding Your Skin’s Red Flag

Introduction to Sun Rash

As the warm sun beckons us outside, many enjoy basking in its glow without realizing that it can sometimes signal trouble for our skin. One of the common skin conditions that can arise from sun exposure is known as sun rash. Also termed as polymorphic light eruption (PLE), this condition manifests as red, itchy patches or bumps on sun-exposed areas. Understanding sun rash is vital for effectively managing it and ensuring our skin remains healthy and radiant.

Identifying Sun Rash: Key Symptoms

Early detection of sun rash is paramount. You might notice symptoms such as persistent redness, intense itching, or a burning sensation following sun exposure. As you observe these symptoms, pay close attention to additional signs such as the formation of bumps, patchy rashes, and swelling. If you recognize these indicators, it’s crucial to seek shade and take appropriate actions to alleviate discomfort and prevent further reactions. Soothing lotions, cool compresses, and preventive measures can be quite beneficial in relieving symptoms.

Understanding Photosensitivity

Photosensitivity plays an essential role in sun rash occurrences. Those with sensitive skin may experience heightened reactions to UV rays due to various factors, including medications and certain skincare products. Understanding your skin’s reaction to the sun can help in avoiding triggers that may cause or exacerbate sun rash. Identifying specific products that may lead to photoallergic reactions and consulting with dermatology experts can provide clarity and solutions tailored to your skin type.

Immediate Relief: How to Soothe Sun Rash

If you experience a sun rash, various immediate relief measures can be employed. Start by applying cool damp compresses directly onto the affected area to soothe inflammation. Staying hydrated is crucial, as it helps promote skin healing. Products with natural ingredients like aloe vera or calamine can also provide relief from inflammation and itching. If notable discomfort persists, over-the-counter lotions or other anti-itch treatments can support recovery. Seeking medical advice from a specialist is recommended if symptoms worsen or last longer than expected.

Long-term Sun Protection: Keeping Your Skin Rash-Free

Prevention is always better than cure when it comes to sun rash. The Skin Artistry recommends proactive strategies such as wearing protective clothing, such as lightweight long-sleeved shirts and wide-brimmed hats, to shield your skin from harmful UV rays. Opting for a broad-spectrum sunscreen with an SPF of 30 or higher is vital for protecting vulnerable areas. Regular skin checks and avoiding the sun during peak hours can significantly mitigate the chances of developing sun rash, ensuring your skin stays healthy and free from irritation.

Conclusion: Take Charge of Your Skin Health

Understanding sun rash is essential for anyone enjoying time under the sun. By recognizing the symptoms, understanding photosensitivity, seeking immediate relief, and adopting long-term prevention practices, you can protect your skin effectively. Remember, if you’re unsure or facing persistent symptoms, do not hesitate to reach out to a dermatologist for expert guidance. Proactive skincare routines combined with professional advice can significantly enhance your skin’s health and beauty.

FAQs

1. What causes sun rash? Sun rash can be triggered by overexposure to UV rays, medications, or inherent skin sensitivity.

2. How can I identify sun rash promptly? Look for signs like redness, itching, and rash formation shortly after sun exposure.

3. When should I consult a dermatologist regarding sun rash? If symptoms persist, worsen, or are coupled with other concerning signs, seek professional medical advice.

For professional assistance and expert advice from leading dermatologists like Dr. Hital Patel, experience the benefits of Unveiling the Sun Rash Mystery: A Guide to Understanding Your Skin’s Red Flag with Hair & Skin Specialist Dr. Hital Patel at The Skin Artistry. Our clinics in PDPU Gandhinagar, Vastrapur Ahmedabad, and Hyderabad (Visiting Consultant) offer top-quality care and personalized treatments. Visit us today to learn more about our services and take advantage of our special offers! For more insights, updates, or to collaborate, stay connected with The Skin Artistry.

Tips and Tricks for Extending the Life of Your Skin Care and Makeup

image

Tips and Tricks for Extending the Life of Your Skin Care and Makeup

Introduction

With the variety of skin care and makeup products available today, it’s essential to know how to keep them fresh and effective for as long as possible. At The Skin Artistry, we understand that you want your products to last and deliver the best results for your skin. This article will provide you with practical tips and tricks for extending the life of your skin care and makeup products, ensuring they remain safe and beneficial.

Makeup: Keep it Fresh and Clean

One of the most crucial elements in prolonging the life of your makeup is maintaining proper hygiene. Regularly washing your makeup brushes is essential. Aim to clean them weekly to avoid bacteria buildup, which can contribute to skin irritations and breakouts. Consider using a gentle brush cleanser, as this will help prolong the longevity of your brushes and ensure a flawless makeup application.

Foundation: Look for Signs of Aging

Foundation is a staple in makeup routines, but its vital to monitor its condition closely. Be aware of separation or dryness, as these are clear indicators that your foundation might not be performing as intended. Opting for foundations in pump or squeezable tubes can significantly help, as they minimize contact with air and bacteria, extending their viability. Keep an eye on the product texture to ensure youre getting the best results.

Mascara: When to Say Goodbye

Mascara has a shorter shelf life than most makeup products, often requiring replacement every few months. Watch for changes in texture or application; if its flaking or applying unevenly, it may be time for a new tube. To make your mascara last longer, remember to swirl the wand instead of pumping it in and outthis prevents air from entering the tube, which can hasten drying out and spoilage.

Skin Care: Key Signs and Symbols

When it comes to skin care, consistency is key. Always check the Period After Opening (PAO) symbol on your products, as this indicator reveals how long a product is expected to remain effective after being opened. Note any changes in consistency or separation. Choosing skin care products that come in tubes or pump packaging can also help maintain their freshness and reduce exposure to contaminants.

Bacteria: The Hidden Enemy

The presence of bacteria in your makeup and skin care products can lead to skin irritations and blemishes. Regularly check for any signs of unusual odor, texture, or changes in color. Practicing good hygiene with proper storage and application methods not only increases the lifespan of your products but also protects your skin. Avoid using fingers to apply products whenever possible; instead, opt for tools that can be easily cleaned.

Conclusion: Take Action for Beautiful Skin

Extending the life of your skin care and makeup products is essential for maintaining healthy skin and maximizing your investment. By following these tipskeeping your tools clean, monitoring product conditions, and being mindful of expiration datesyou can enjoy your favorite products for longer while ensuring they remain safe for use. For expert guidance and tailored solutions, reach out to The Skin Artistry for professional assistance.

FAQs

How often should I clean my makeup brushes?
It is recommended to wash your brushes at least once a week to prevent bacteria buildup and ensure proper application.

What should I look for to know if my foundation has expired?
Signs such as separation and a change in texture or consistency indicate that it may be time to replace your foundation.

For professional assistance and expert advice from leading dermatologists like Dr. Hital Patel, experience the benefits of Tips and Tricks for Extending the Life of Your Skin Care and Makeup with Hair & Skin Specialist Dr. Hital Patel at The Skin Artistry. Our clinics in PDPU Gandhinagar, Vastrapur Ahmedabad and Hyderabad (Visiting Consultant) offer top-quality care and personalized treatments. Visit us today to learn more about our services and take advantage of our special offers! For more insights, updates, or to collaborate, stay connected with The Skin Artistry.

The Ultimate Guide to Banishing Cellulite

image

The Ultimate Guide to Banishing Cellulite

Understanding Cellulite

Cellulite affects many women, regardless of their fitness levels or size. This skin condition is characterized by the dimpled appearance of skin, particularly noticeable on the thighs, hips, and buttocks. If you’ve ever caught a glimpse of your skin in the mirror and found distress over those pesky dimples, we want you to know that you’re not alone. In this comprehensive guide, we will explore effective cellulite treatments, helping you find the best options available to banish cellulite once and for all.

What Causes Cellulite?

Before diving into treatments, it’s essential to understand what causes cellulite. This dimpling occurs when fat deposits push through connective tissue beneath the skin. Factors contributing to the visibility of cellulite can include genetics, hormonal changes, and body fat percentage. It is not simply a problem of excess weight; even fit people can have cellulite. Understanding the root causes is crucial before embarking on the journey to reduce its appearance.

Top Treatments for Cellulite

There are various treatment options for cellulite to consider that can help make it less noticeable. Lets explore some of the most effective methods backed by research:

Acoustic Wave Therapy

Studies have shown that acoustic wave therapy can significantly reduce the appearance of cellulite. This treatment utilizes sound waves to break down fat cells and improve skin texture. To achieve the best results, patients typically require multiple sessions.

Subcision

A technique known as Cellfina involves inserting a needle under the skin to sever the tough bands causing dimpling. Clinical studies have reported that 99% of patients were satisfied with their results, with effects lasting up to two years.

Laser Treatments

Various laser treatments are available, with one effective method being minimally invasive. A tiny laser fiber is inserted beneath the skin to break up the bands causing cellulite and possibly thicken the skin, reducing visibility. Results may last a year or longer with proper care.

Vacuum-assisted Treatments

This method involves using a device with small blades to cut through the tough bands. Some patients have reported lasting results of up to three years from this treatment.

For persistent cellulite, combine these therapies with lifestyle changes for optimal results. Maintaining a healthy diet and exercise routine can contribute to the lasting effects of cellulite treatments.

Home Remedies and Lifestyle Changes

If professional treatments are not an immediate option, numerous home remedies could help mitigate cellulite. Staying hydrated and consuming nutrient-rich foods rich in omega-3 fatty acids, antioxidants, and fiber can diminish the appearance of cellulite over time. Additionally, engaging in strength training can build muscle and help smooth out the skins appearance, making cellulite less noticeable.

Using topical creams that contain caffeine or retinol may also have a positive effect on the skins appearance. While results may take some time to show, consistency is vital.

Which Option is Right for You?

Given the wide range of cellulite treatments available, choosing the best method for your needs is crucial. Consulting with a dermatologist can provide tailored advice considering your skin type and cellulite severity. They can recommend the most suitable options and ensure the chosen treatment is safe and effective.

The journey to banish cellulite doesnt have to be overwhelming; being informed is the first step toward achieving smoother skin.

FAQs About Cellulite

Q: Can diet really influence cellulite?
A: Yes, maintaining a balanced diet rich in nutrients can improve skin health and potentially reduce the appearance of cellulite.

Q: Are cellulite treatments permanent?
A: Many treatments offer temporary results; ongoing maintenance may be necessary to sustain their effects.

Conclusion

Banish your worries about cellulite by exploring the various effective treatments and lifestyle changes mentioned above. Remember, the visibility of cellulite varies from person to person, so what works for one may differ for another. Its essential to find a method that resonates with you and consult an expert if needed. For professional assistance and expert advice from leading dermatologists like Dr. Hital Patel, experience the benefits of The Ultimate Guide to Banishing Cellulite with Hair & Skin Specialist Dr. Hital Patel at The Skin Artistry. Our clinics in PDPU Gandhinagar, Vastrapur Ahmedabad, and Hyderabad (Visiting Consultant) offer top-quality care and personalized treatments. Visit us today to learn more about our services and take advantage of our special offers! For more insights, updates, or to collaborate, stay connected with The Skin Artistry.

The Complete Guide to Hair Spa: Benefits, Risks & DIY Care

image

The Complete Guide to Hair Spa: Benefits, Risks & DIY Care

Introduction

Have you ever walked into a salon only to be mesmerized by the fragrant smell of hair spa treatments? The allure of beautifully soft and nourished hair has drawn many into this world. Hair spa treatments are all the rage for achieving shiny locks and a healthy scalp. But questions often linger – are these treatments genuinely beneficial, do they come with risks, and can you recreate the magic at home? Fear not! We will uncover the benefits, risks, and simple DIY care for effective hair spa solutions.

What is a Hair Spa Treatment?

A hair spa is more than a luxurious indulgence; it’s a professional service that entails a series of steps designed to rejuvenate, nourish, and repair your hair. From deep cleaning and moisturizing to revitalizing your scalp, it’s an essential part of a healthy hair care routine. With the right treatment, you can combat issues like hair fall, dandruff, and dry scalp effectively.

Benefits of Hair Spa Treatments

The benefits of hair spa treatments are numerous. First and foremost, they are excellent for blood circulation. A good scalp massage increases blood flow to the hair follicles, which can promote hair growth. Furthermore, these treatments effectively remove impurities and unclog scalp pores, addressing problems that lead to hair issues. Consistent spa treatments can also help normalize oil secretion, ensuring your scalp remains balanced, hydrated, and free from excessive grease or dryness. The included moisturizing ingredients bring life back to your hair, making it smooth and frizz-free overall.

Risks and Considerations

While hair spa treatments have plenty of benefits, there are some considerations to keep in mind. Consistency is key; infrequent treatments may not yield desired results. Additionally, you should always discuss your specific hair type and concerns with your therapist to avoid unwanted reactions, particularly if you have colored hair which might fade. Lastly, remember that hair spa treatments should be considered a supplement to your regular hair care routine, not a replacement.

DIY Hair Spa: Easy Steps to Follow

Not everyone has the time or resources to visit a salon frequently, but you can certainly enjoy similar benefits at home! Begin by massaging your scalp with warm coconut or olive oil for about 10 minutes. Follow it up with a hydrating hair mask. Common ingredients for your mask can include honey and aloe vera. After leaving it on for 30 minutes, rinse with lukewarm water. This simple DIY hair spa can deliver amazing results and promote healthier, shinier hair without stepping out!

Maintain Your Hair Post Spa Treatment

After enjoying a blissful hair spa, it’s crucial to follow the right aftercare. Avoid tight hairstyles that can stress your hair and refrain from using heat tools immediately after the treatment. Remember also to protect your locks from sun damage by wearing a hat or using hair products that contain UV protection. Doing so will preserve the benefits of your spa experience and ensure your hair stays nourished and healthy.

Conclusion

Hair spa treatments can truly transform your hair and scalp health. With the right techniques and a consistent regimen, you can enjoy significant benefits while minimizing risks. Whether you visit a salon for a professional treatment or choose to indulge yourself with DIY care at home, nurturing your hair can be a fulfilling experience. So go ahead, treat yourself to a spa day for your hair, and revel in the results!

Frequently Asked Questions

Q: How often should I get a hair spa treatment?
It’s recommended to indulge in a hair spa treatment once every 2-3 weeks for optimal results.

Q: Can I do a hair spa at home?
Absolutely! A simple DIY hair spa can be done with common household ingredients and can be just as effective.

For professional assistance and expert advice from leading dermatologists like Dr. Hital Patel, experience the benefits of Hair Spa with Hair & Skin Specialist Dr. Hital Patel at The Skin Artistry. Our clinics in PDPU Gandhinagar, Vastrapur Ahmedabad and Hyderabad (Visiting Consultant) offer top-quality care and personalized treatments. Visit us today to learn more about our services and take advantage of our special offers! For more insights, updates, or to collaborate, stay connected with The Skin Artistry.

Unveiling the Creative Journey

image

Unveiling the Creative Journey

Understanding the Essence of Creativity

Creativity is a miraculous process that allows individuals to express themselves and transform their ideas into reality. Whether it’s through art, writing, or innovative problem-solving, the creative journey is one that reflects our inner selves. This blog will explore the various stages of this journey and how embracing it can lead to personal growth and fulfillment.

The Stages of the Creative Process

Every creative journey has distinct stages. Initially, there is the inspiration phase, where ideas begin to spark. Following this is the exploration phase, characterized by experimentation and open-mindedness. This process might involve free writing, sketching, or brainstorming, allowing ideas to evolve organically. Engaging in these activities not only enhances creativity but also helps in developing a broader perspective on the subject matter.

Overcoming Creative Blocks

Creative blocks can be frustrating and daunting. Many often face periods where inspiration seems elusive. Acknowledging these moments is essential. Techniques such as changing your environment, collaborating with others, or even stepping away for a bit can often reignite the spark of creativity. Finding new sources of inspiration, such as visiting art galleries or reading diverse literature, can help overcome these hurdles. Remember, taking a break is sometimes the best way to spark new ideas.

The Role of Self-Reflection in Creativity

Self-reflection is a vital part of the creative journey. It allows you to assess your strengths and weaknesses, understand your artistic choices, and navigate obstacles with clarity. Keeping a journal or a creative log can be beneficial in tracking progress and thoughts throughout your journey. Reflecting on what worked and what didn’t prepares you for future endeavors, enhancing your creative skills over time.

Actionable Steps to Enhance Your Creative Process

To fully embrace your creative journey, consider incorporating the following actionable steps into your routine:

  • Set aside dedicated time for creative activities free from distractions.
  • Experiment with different mediums or styles to discover new interests.
  • Reach out for feedback from peers or mentors to gain fresh perspectives.
  • Participate in workshops or online courses to learn new techniques.

These strategies will help cultivate your creativity and develop a robust creative foundation.

Conclusion

Embracing the creative journey is about exploration, reflection, and persistence. Each individuals creative path is unique, and there is no single way to approach it. By allowing yourself to dive deeply into this journey, you foster personal growth and discover the joy creativity can bring. Remember to take your time and celebrate each small victory along the way, as these steps accumulate into a fulfilling creative life.
For professional assistance and expert advice from leading dermatologists like Dr. Hital Patel, experience the benefits of Unveiling the Creative Journey with Hair & Skin Specialist Dr. Hital Patel at The Skin Artistry. Our clinics in PDPU Gandhinagar, Vastrapur Ahmedabad and Hyderabad (Visiting Consultant) offer top-quality care and personalized treatments. Visit us today to learn more about our services and take advantage of our special offers! For more insights, updates, or to collaborate, stay connected with The Skin Artistry.

Unlock the Secrets to Homemade Hair Growth Oils

image

Unlock the Secrets to Homemade Hair Growth Oils

Your Guide to Luxurious Locks

Are you tired of searching for hair growth solutions that promise the moon but deliver little? Youre not alone! Many people are realizing the power of nature as they turn to homemade hair growth oils. This blog will not only highlight the best natural recipes but will also guide you in unlocking the secrets behind effective hair care. Get ready to pamper your hair while embracing the nourishing elements that can promote healthy hair growth!

Benefits of Homemade Hair Growth Oils

Homemade hair oils provide a treasure trove of benefits. Unlike commercial hair products, they are free from harmful chemicals and preservatives, making them a safe choice for your scalp and strands. Furthermore, homemade hair growth oils are packed with natural nutrients and vitamins that improve blood circulation, reduce hair fall, and enhance overall hair health. Ingredients like curry leaves and hibiscus are known for their restorative properties. By opting for these natural solutions, you’re setting a foundation for gorgeous hair.

Crafting Your Own DIY Hair Oils

There are several simple recipes you can try at home. Utilizing easily accessible ingredients will help you create your personalized concoctions tailored to your specific hair needs.

Curry Leaves Oil

To make curry leaves oil, begin by sun-drying 8 to 10 curry leaves for two days. Next, boil them in 100 ml of coconut oil. Allow it to cool, then strain it into a bottle. This oil is rich in antioxidants and amino acids, enhancing hair vitality.

Onion Hair Oil

Onions, famously packed with sulphur, can balance the pH level of your scalp. Finely chop 3-4 onions, extract the juice, and mix it with an equal part of coconut oil. Simmer on low flame for 10-15 minutes, and you have a potent hair growth oil.

Hibiscus Oil

Known for its amazing benefits, hibiscus can be prepared by sundrying the flowers first. Heat the dried petals in coconut oil on low flame for about five minutes and strain the mixture. This oil helps nourish the scalp and encourages hair thickness.

Amla Hair Oil

Amla, a powerhouse of nutrients, is fantastic for hair growth. Slice Amla fruits and let them dry in the sun. Boil them with coconut oil until bubbles appear. The result is an oil that not only promotes growth but also prevents premature greying.

Consistency is Key

Just as with any effective hair care routine, consistency is crucial. Regular use of these homemade hair growth oils can take several months to display visible results, but the journey towards healthier hair is worth the wait. Experiment with different combinations of herbs and oils to discover what works best for your hair type.

Frequently Asked Questions (FAQs)

What is the easiest homemade hair oil recipe for hair growth?

All the recipes provided above are easy to make and utilize commonly found ingredients.

How often should I use hair oils?

While some ingredients like onion oil have strong scents and should be used weekly, lighter oils such as amla or curry leaves can be applied up to twice a week.

Conclusion

Unlocking the secrets to homemade hair growth oils can lead you on the path to healthy, beautiful hair. With just a bit of effort and creativity, you can create nourishing oil blends right in your own kitchen. For the best results, tailor these recipes to your hair’s unique requirements and enjoy the process of taking care of your tresses.

For professional assistance and expert advice from leading dermatologists like Dr. Hital Patel, experience the benefits of unlocking the secrets to homemade hair growth oils with Hair & Skin Specialist Dr. Hital Patel at The Skin Artistry. Our clinics in PDPU Gandhinagar, Vastrapur Ahmedabad, and Hyderabad (Visiting Consultant) offer top-quality care and personalized treatments. Visit us today to learn more about our services and take advantage of our special offers! For more insights, updates, or to collaborate, stay connected with The Skin Artistry.

Are Hair Transplants Worth the Hype?

image

Are Hair Transplants Worth the Hype?

Understanding Hair Transplants

Hair loss can be a distressing experience for many people, leading to a desperate search for effective solutions. One of the most talked-about options is hair transplant surgery. But are hair transplants truly worth the hype? To help you navigate this complex issue, lets delve into the facts, benefits, and potential drawbacks of hair transplantation.

What is Hair Transplantation?

Hair transplantation is a surgical procedure that involves moving hair follicles from an area with thicker hair (the donor site) to balding or thinning areas (the recipient site). This method has gained immense popularity in recent years, particularly among individuals facing severe hair loss. With advancements in techniques, such as Follicular Unit Extraction (FUE), the procedure has become more accessible and less invasive.

The Pros of Hair Transplants

One significant advantage of hair transplant surgery is that the results look remarkably natural since the hair follicles transplanted are your own. This means they are manageable and blend seamlessly with existing hair. Furthermore, as your own hair is used, there is minimal risk of rejection, making it a viable long-term solution for hair loss. Patients can expect their transplanted hair to mature and begin regular growth within several months, offering a potential for permanent results.

Potential Drawbacks

However, it’s essential to consider some cons associated with hair transplantation. Recovery can take timeoften a few weeksbefore normal activities can be resumed. There are also instances where the procedure might not yield the expected results, leading to disappointment. Hair transplant surgery is not a one-size-fits-all solution and may require multiple sessions, even then some hair follicles could fail to thrive.

Are Hair Transplants Worth It?

So, are hair transplants worth the hype? For many, they provide a genuine opportunity for hair restoration, particularly when other treatments have failed. It is essential, however, to approach this option with realistic expectations. Consulting with dermatologists to understand the potential outcomes and combining hair transplantation with other hair loss treatments could enhance results significantly.

Conclusion: Making Informed Choices

If you’re contemplating a hair transplant, weigh the pros and cons carefully. It’s advisable to seek professional advice to determine the best course of action for your hair loss dilemma. Prioritize going to a trusted clinic that specializes in hair restoration to ensure you are making an informed decision that aligns with your unique needs.

FAQ

Q: How long does a hair transplant procedure take?
A: The duration typically ranges from 4 to 8 hours, depending on the complexity of the case.
Q: What should I expect during recovery?
A: Patients may experience minor discomfort, redness, and swelling for a few days post-procedure, but most can return to their normal routines within a week.

For professional assistance and expert advice from leading dermatologists like Dr. Hital Patel, experience the benefits of hair transplants with Hair & Skin Specialist Dr. Hital Patel at The Skin Artistry. Our clinics in PDPU Gandhinagar, Vastrapur Ahmedabad, and Hyderabad (Visiting Consultant) offer top-quality care and personalized treatments. Visit us today to learn more about our services and take advantage of our special offers! For more insights, updates, or to collaborate, stay connected with The Skin Artistry.